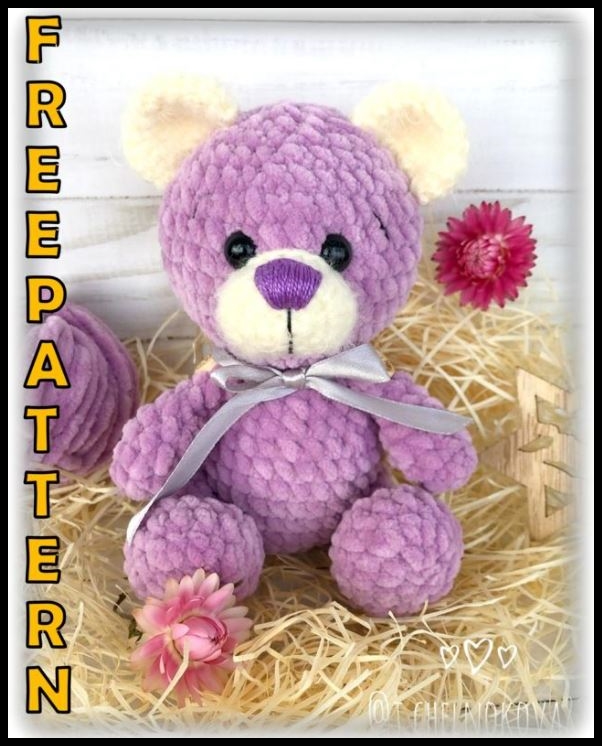
Amigurumi Velvet Cute Teddy Bear Free Crochet Pattern
Welcome to our website where you can find the most beautiful and highest quality samples of Amigurumi patterns. All the amigurumi patterns you can’t find are available on our website. Every day we continue to share new amigurumi patterns for you. Stay tuned to reach these amigurumi patterns before anyone else
Abbreviations:
SC – single crochet
İNC – increase
DEC – decrease
CH – chain
I. Preparatory work.
For work, we need:
1. Skills for crocheting basic elements;
2.Plush yarn. I use YarnArt Dolce either
Himalaya Dolphin Baby (120 m / 100 g): Approximate
consumption – 50-60 grams.
3. Alize Softy (115 m / 50 g), Nako Paris or any other
fluffy yarn of similar thickness 10 grams – per
face and ears.
4. Cotton yarn for embroidery muzzle, tightening,
sewing on the legs. I use Iris PNK them.
S.M. Kirov;
5.Nose on a secure mount, if no embroidery
strength / desire / skills;
6. 4-5mm hook for plush yarn. Navigate
at its knitting density. Need to pick
a hook in which there will be no holes in the canvas.
7.Hook 2.5-3 mm for knitting the muzzle and ears;
8.Sintepuh or other filler;
9. Eyes on a secure mount 10-12mm. I
I use black eyes 10mm. Usually,
what is at hand. Next up is improvisation.
10.4 buttons for button fastening paws 12-13
mm;
11. Thin fishing line for button fastening;
12. A needle with a thick eye for sewing on parts.
It is important that the eye of the needle passes through the holes in
with buttons.
Using these materials, the growth of the toy
is about 20 cm.
Handles, they are front paws (2 parts).
Left foot:
The yarn is the main color.
1 row: 6 sc into magic ring (6);
2 row: (Sc, inc) x 3 times (9);
3-4 row (2 rows): 9 sc (9);
5 row: 3 Dec, 3 sc (6);
6-8 row (3 rows): 6 sc (6);
Right foot:
The yarn is the main color.
1 row: 6 sc into magic ring (6);
2 row: (Sc, inc) x 3 times (9);
3-4 row (2 rows): 9 sc (9);
5 row:, 3 sc, 3 Dec (6);
6-8 row (3 rows): 6 sc (6);
Do not fill the paws, fold them in half and connect 3
sc. We fix the thread and hide the tip inside the bloopers.
Legs, they are hind legs (2 parts):
Yarn of the main color:
1 row: 6 sc into magic ring (6);
2 row: İnc x 6 times (12);
3 row: 3 inc from HDC, 3 sc, 3 inc from HDC, 3 sc (18);
4-5 rows (2 rows): 18 sc (18);
6 row: dec x4 times, 8sc, dec (13);
7 row: dec x3 times, 7sc (10);
8-10 row (3 rows): 10 sc (10);
We stuff the syntepuh paws up to about 6-7 rows.
11 row: dec x 5 times, connecting column.
We tighten the ring. We fix the thread and hide the tip
inside the bloopers.
Option: the first three rows of paws can be connected to another
color of yarn. And then heels will turn out.
The body and head are knitted in one piece.
The yarn is the main color.
1 row: 6 sc into magic ring (6);
2 row: İnc x 6 times (12);
3 row: (Sc, inc) x 6 times (18);
4 row: (2 sc, inc) x 6 times (24);
5 row: (3 sc, inc) x 6 times (30);
6-9 row (4 rows): 30 sc (30);
10 row: (8 sc, dec) x 3 times (27);
11 row: (7 sc, dec) x 3 times (24);
12 row: (6 sc, dec) x 3 times (21);
13 row: (5 sc, dec) x 3 times (18);
14 row: (4 sc, dec) x 3 times (15);
15 row: (3 sc, dec) x 3 times (12);
We do not break the thread, we begin to knit the head:
16 row: for the front half-loop (Sc, inc) x 6 times (18);
17 row: (2 sc, inc) x 6 times (24);
We stuff the body.
18 row: (3 sc, inc) x 6 times (30);
19 row: (4 sc, inc) x 6 times (36);
20-24 rows (5 rows): 36sc (36);
25 row: (4 sc, dec) x 6 times (30);
Insert the eyes between the 22nd and 23rd row (6th and 7th row of the head)
so that between them there is a distance of 4 sc (in the photo everything
well marked).
26 row: (3 sc, dec) x 6 times (24);
27 row: (2 sc, dec) x 6 times (18);
28 row: (sc, dec) x 6 times (12);
We stuff our head.
29 row: dec x 6 times (6), connecting column.
We tighten the ring, hide the thread.
Muzzle (1 piece):
1 row: 6 sc into magic ring (6);
2 row: İnc x 6 times (12);
3 row: (Sc, inc) x 6 times (18);
4 row: 3 inc of HDC, 6 sc, 3 inc of HDC, 6 sc (24);
5-6 rows (2 rows): 24 sc (24).
We complete the row with a connecting column so that
align the edge.
Ears (2 parts).
1 row: 1 row: 6 sc into magic ring (6);
2 row: Increases in each loop, that is, inc x 6 times (12);
3 row: (Sc, inc) x 6 times (18);
4 row: (2 sc, inc) x 6 times (24);
5-6 rows (2 rows): 24 sc each;
7 row: (2 sc, dec) x 6 times (18);
Body assembly.
Stage 1: The muzzle is not tightly filled with filler and
we place it symmetrically to the eyes. Top edge
the muzzle is between the 22nd and 23rd rows, the lower
between 18 and 19 rows. Gently sew, gradually
filling the muzzle with the filler is more dense.
Stage 2: embroider the nose. Turn the thread to where it’s clean
hypothetically should be rotik (between 3 and 4
rows from the edge), display the thread on top between the first and
second near the edge and embroider the nose. At the end
work the thread is displayed in the region of the mouth 1 sc to the left or
to the right, we connect the ends with knots, we hide the strings. Or
insert the spout on the secure mount.
Stage 3: weight loss. I will use black Iris. The same
I will embroider a muzzle with a thread. We get a thread in the area
mouth, leave the tip.
We remove the needle from the outside of the left eye, start
a needle on the inside of the left eye.
Withdraw from the inside of the right eye, stretch
a thread.
The thread should pass over the left eye, slip
between the eye and the yarn and lie on the leg of the eye. Further –
start the needle from the outer corner of the right eye
and withdraw into the mouth, stepping back from the tip of the yarn 1 sc.
Pull the thread until a pleasant
eye muzzle. Tie a knot.
Repeat the focus a second time. Embroider the bridge of the nose
tie knots and hide the ends of the yarn.
Stage 4: ears are placed symmetrically to the eyes and muzzle
across four rows. Sew on.
Stage 5: Embroider the eyebrows.
6 stage. Fasten the legs. The paws are fastened with buttons.
T.N. “Button fastening”. When doing this
I recommend using kind of fastening along with a thread
thin fishing line.
I use 13 mm buttons and a long needle.
First of all, I begin to fasten the “hands”. They are
are located closest to the face, which means they are easier
place symmetrically the muzzle.
I start with the left paw. Always looking for a needle from the side
which will come in contact with the body. In the middle of a row
between the last and penultimate row. I got a needle
brought out on the other hand, done a button, returned the needle to
same hole on the foot.
Now you need to pass the needle and thread through
the body is symmetrical. I do it at a level between 2 and 3
rows from the neck. That is, between the rows, where 18 sc and 24 sc.
Next, a second paw, button and needle are strung on the needle
comes back through the body to the left paw. Knot
I make an armpit and stretch the ends together with the knot
inside the left foot.
I fix the “legs” according to the same principle. Between 5 and 6 rows
torso.
Bear is ready! Not difficult, right? Magic yes and only…