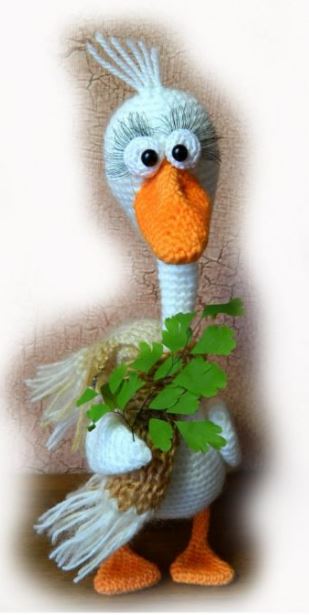
Amigurumi Goose Free Crochet Pattern
Materials and tools:
• Yarn “Nako Alaska” for the body, or “Novelty for children”
• Yarn “Yarn Art jeans” orange for beak and paws, white for eyes, also suitable
“Novelty for children.” The main thing is that the yarn for the beak, paws and eyes is not thicker
basic to the body.
• Mohair yarn for scarf
• Black beads for pupils of the eyes
• Eyelashes in this case are ready
• Holofiber or other filler
• Aluminum wire for the frame with a cross section of 1.5 mm (or copper 1.0 mm) approximately
60cm
• Hooks No. 2.5 and No. 2.0 (Gamma), knitting needles No. 2, hand needle
Abbreviations
• Sc – single crochet
• İnc – increase (2 sc from one loop)
• Dec – decrease (knit two loops together)
• Ch – chain
• (number) – the number of loops in a row
PATTERN
Head-neck-body (knit in one piece)
1.6 sc into magic ring
2.6 inc = 12
3. (1 inc, 1 sc) × 6 = 18
4. (1 inc, 2 sc) × 6 = 24
5. (1 inc, 3 sc) × 6 = 30
6.30 sc
7. (1 inc, 4 sc) × 6 = 36
8.8-14 rows = 36
15. (1 dec, 4 sc) × 6 = 30
16. (1 dec, 3 sc) × 6 = 24
17.24 sc
18. (1 dec, 2 sc) × 6 = 18
At this stage, we tightly fill our heads (only not to a stone state).
19. 18 sc
20. 18 sc
21. (1 dec, 1 sc) × 6 = 12
22.12 sc
23.12 sc
Fill the top of the neck a little.
24. 1 dec, 10sc = 11
25.11 sc
26.11 sc
27.1 dec, 9sc = 10
28.10 sc
29.10 sc
30.1 dec, 8 sc = 9
31. 9 sc
32. 9 sc
33. 9 sc
34.1inc, 8 sc = 10
35.10 sc
36.1 inc, 9 sc = 11
37.11 sc
38.11 sc
39.1 inc, 10sc = 12
40. 12 sc
41.12 sc
42. (1 inc, 3 sc) × 3 = 15
43.15 sc
44. (1 inc, 4 sc) × 3 = 18
45. (1inc, 2 sc) × 6 = 24
46. (1inc, 3 sc) × 6 = 30
47.30 sc
48. (1inc, 4 sc) × 6 = 36
49. (1inc, 5 sc) × 6 = 42
50. 41-52 rows = 42 sc
53. (1inc, 6 sc) × 6 = 48
54. 54 – 59 rows = 48 sc
60. (1 dec, 4 sc) × 8 = 40
61. (1 dec, 3 sc) × 8 = 32
62. (1 dec, 2 sc) × 8 = 24 –
We try on the length and insert the frame with paws into the body, if the neck area
wrap with a band-aid, then you can not fill your neck. We continue to knit the torso
around the wire legs. Push the knitted tabs slightly down the frame, then
gently fix them directly to the body.
63. (1 dec, 2 sc) × 6 = 18
64. (1 dec, 1 sc) × 6 = 12
65.2 dec = 6 – tighten the loop, remove the thread.
Beak (use hook number 2.0)
1. Chain 4 ch
2. With the second 2 sc, 3 in 1, 1 sc, 1inc = 8
3. 8sc
4.2 sc, 2 inc, 2 sc, 2 inc = 12
5.2 sc
6. (1inc, 3 sc) × 3 = 15
7.15 sc
8. (1inc, 4 sc) × 3 = 18
9.18 sc
10. (1inc, 5 sc) × 3 = 21
11.21 sc
12. (1inc, 6 sc) × 3 = 24
13.13-15 rows 24 sc
The beak is not too tight. Sew the beak to the head in front, slightly
Having flattened, and make sure that the spatula in front of the beak is located
horizontally. On the beak it is necessary to make weights to give a natural
appearance.
Paws
1. A chain of 9 ch
2. With the second 7 sc, 3 sc in 1, 6 sc, 1 inc = 18
3.18 sc
4.8 sc, 1 dec, 7 sc 1 dec = 16
5. 7 sc, 1 dec, 6 sc, 1 dec = 14 – insert the loop into the foot, then knit around
wire.
6. 6 sc, 1 dec, 5 sc, 1 dec = 12
7.5 sc, 1 dec, 4 sc, 1 dec = 10
8.4 sc, 1 dec, 3 sc, 1 dec = 8
9.3 sc, 1 dec, 2 sc, 1 dec = 6
10.1 dec, 4 sc = 5
11. 11-20 rows 5 sc – leave the thread to secure the presser foot to the body.
Sew paws to the body, hide the ends of the thread.
Size ratio
Tail
1. Chain 4 ch
2. With the second 2 sc, 3 in 1, 1 sc, 1inc = 8
3. 8sc
4.2 sc, 2 inc, 2 sc, 2 inc = 12
5.2 sc
6. (1inc, 3 sc) × 3 = 15
7.15 sc
8. (1inc, 4 sc) × 3 = 18
9.18 sc
10. (1inc, 2 sc) × 6 = 24
11.24 sc
12. (1inc, 3 sc) × 6 = 30
13.30 sc
14. (1inc, 4 sc) × 6 = 36
15.36 sc
Stuff the tail not too tight so as not to outweigh. Sew the tail to the body
from behind. The spatula at the end of the tail should be horizontal.
Wings (2 pcs)
1.6 sc into magic ring
2.6 inc = 12
3. (1 inc, 1 sc) × 6 = 18
4. 4 – 9 rows of 18 sc
10. (1 dec, 4 sc) × 3 = 15
11.11-13 rows of 15 sc
14. (1 dec, 3 sc) × 3 = 12
15.15-16 rows 12sc
17. (1 dec, 2 sc) × 3 = 9
18.9 sc
19. (1 dec, 1 sc) × 3 = 6
20. 6 sc, pull off.
Wings can simply be sewn to the body. And you can make a thread mount,
then the wings will be movable.
Eyes (use hook number 2.0)
1.6 into magic ring
2.6 inc = 12
3. (1 inc, 1 sc) × 6 = 18
4.18 sc
5. (1 dec, 1 sc) × 6 = 12
6. 6 dec = 6sc, tighten, leave the thread for sewing.
If your eyes are too round balls, you can tighten them a little
before sewing, so that the goose does not turn out to be effervescent.
Goose mounting
Beak placement
Tail placement
Beak
Pins showing places
beak trimming. Weighting is performed
through from top to bottom in a few
orange thread stitches. Region
nostril tightening can be slightly
tint with a brown pencil,
slightly darken.
Wing mount
There are two options for mounting the wings:
The first option is to simply sew the wings on the sides of the body.
The second option is a thread mount. We’ll consider it in detail,
since in the case of a thread mount, the wings will be movable. So:
you need two pieces of any durable thread (I have a boot thread)
about 10-20 cm and a thick needle with a large eye. Necessary in
in the center of each wing hold a thread under 2-3 columns (not through and through, but for one
wing wall). Next, thread both ends of the thread (each wing separately)
into the needle, select on the carcass the location of the wings on the sides and pass
through the attachment point. Withdraw the needle on the back. So do the second
wing and withdraw the needle with threads at the same point where the ends
fastenings of the first wing. Now you need to tighten the wings well
and tightly tie the threads together, hide the knot and ends of the thread inside the goose.
Scarf
We knit a scarf on the knitting needles. We collect 20 loops and knit the usual
elastic band (1 front, 1 wrong loop). Length and color to your
discretion